Thursday, January 15, 2015

Name Frame - Star Wars Theme

This name frame is for a Star Wars fan.  When I was first asked to do a name frame for Mr. SBQ's friend, I didn't know any specifics about colors or themes.  I figured I would do black and cream because that is classic and goes with anything.  I wasn't quite sure how I wanted to do the background for this, and then it hit me......they love Star Wars, so I will get a book and use the pages as the background!  I went to Half Price Books and slightly begged for help finding a book; they were very kind to help me find one that would suit and sold it to me for $1!

I randomly tore out pages from the book, but I did make sure there were some main characters names that showed up here and there on the pages.  I trimmed each page and then just started attaching them at different angles.

I tried to do mod podge on the first background, to seal the pages and give it a nice finish.  The paper curled too much when it dried, so I did another one and just used regular adhesives to attach the pages.

I used lower case letters so I could double mount them and I liked the way they looked better than capital letters.

I attached the book cover to the back of the frame.

It's funny because I was stuck on how to do this frame and then when the Star Wars theme popped into my head, it all came together.  You can't force creativity!

Star Wars Name Frame - Close-up

Star Wars Name Frame - Front

Star Wars Name Frame - Back

Sunday, January 11, 2015

Baney Farm Project - Historical Album

A few years ago my mom showed me the documents from my grandparent's farm.  On that visit home I was going through all my things that were stored in the basement and I found drawings of my grandparents house and barn that I did in college.  That got my creative wheels spinning.  

Many of the papers are ancient and so fragile.  We scanned all the papers and had them printed as photos.   The survey is dated 1847 and mentions 1762; this is my favorite because the handwriting is so beautiful.   The album includes an aerial photo of the farm, the survey, deeds going back to 1806, mortgages, photos I had taken as a teenager, and drawings I did my freshman year of college.  Some of the papers are repeated, with sections blown up so they can be read.  

I had the sketches copied and reduced so they would fit in the album.  They bring back so many memories.  My first year of college was very close to my grandparent's home.  Several times my grandma would pick me up at my dorm and take me home with her.  I would do my laundry and work on my drawing assignments for Art 101, they would feed me real food and then my grandfather would take me back to campus.

The house and barn no longer exist, so I wanted to put all this together to document the farm the way we all remember it.  I made albums for my mom and my aunt for Christmas.  I am still in the process of putting one together for myself.  It was fun to look at all the old documents and the way things were worded.  It was a history lesson on several levels.  It just seemed that it would be nice to have everything together, in a way that it could be looked at any time.  

I was very excited about how it turned out and it brought tears to a few eyes, so I think it was a success!

Baney Farm Project - Aerial Photo


Baney Farm Project - Survey Close-up

Baney Farm Project - Survey Front & Back with Envelope

Baney Farm Project - 1806 Deed

Baney Farm Project - 1918 Deed

Baney Farm Project - 1918 Deed Paperwork

Baney Farm Project - 1918 Deed Paperwork

Baney Farm Project - 1956 Deed

Baney Farm Project - 1956 Deed Paperwork

Baney Farm Project - Barn

Baney Farm Project - Barn 

Baney Farm Project - 1961 Paperwork

Baney Farm Project - 1961 Paperwork

Baney Farm Project - 1961 Paperwork

Baney Farm Project - 1961 Paperwork

Baney Farm Project - 1961 Paperwork

Baney Farm Project - 1961 Paperwork

Baney Farm Project - 1961 Paperwork

Baney Farm Project - 1963 Paperwork

Baney Farm Project - Sketches of House and Barn

Baney Farm Project - Back Page


Monday, January 5, 2015

Cranberry Orange Doughnuts

These are the BEST!  They are perfect, not other way to describe the yummy-ness!

The original recipe came from Two Peas & Their Pod, for Orange Cranberry Bread.  I am still fixed on making all quick breads into doughnuts!  The only thing I changed in the recipe, besides the shape, was that I used rice milk instead of buttermilk.  I used the small cookie scoop to fill each doughnut well - 4 scoops per doughnut.  I baked them at 350 for 15 minutes.   The glaze is easy and really good.  As with all my doughnuts, as soon as they were cool I wrapped them individually in plastic wrap, placed them in large Ziploc bags and put them in the freezer.  It's so great to have a doughnut stash in the freezer!  They don't take very long to thaw and taste like they just came out of the oven.   Right now we have a few of these, chocolate, lemon zucchini, and pumpkin doughnuts in the freezer.


Click here for the original recipe.
Cranberry Orange Doughnuts 
Cranberry Orange Doughnuts

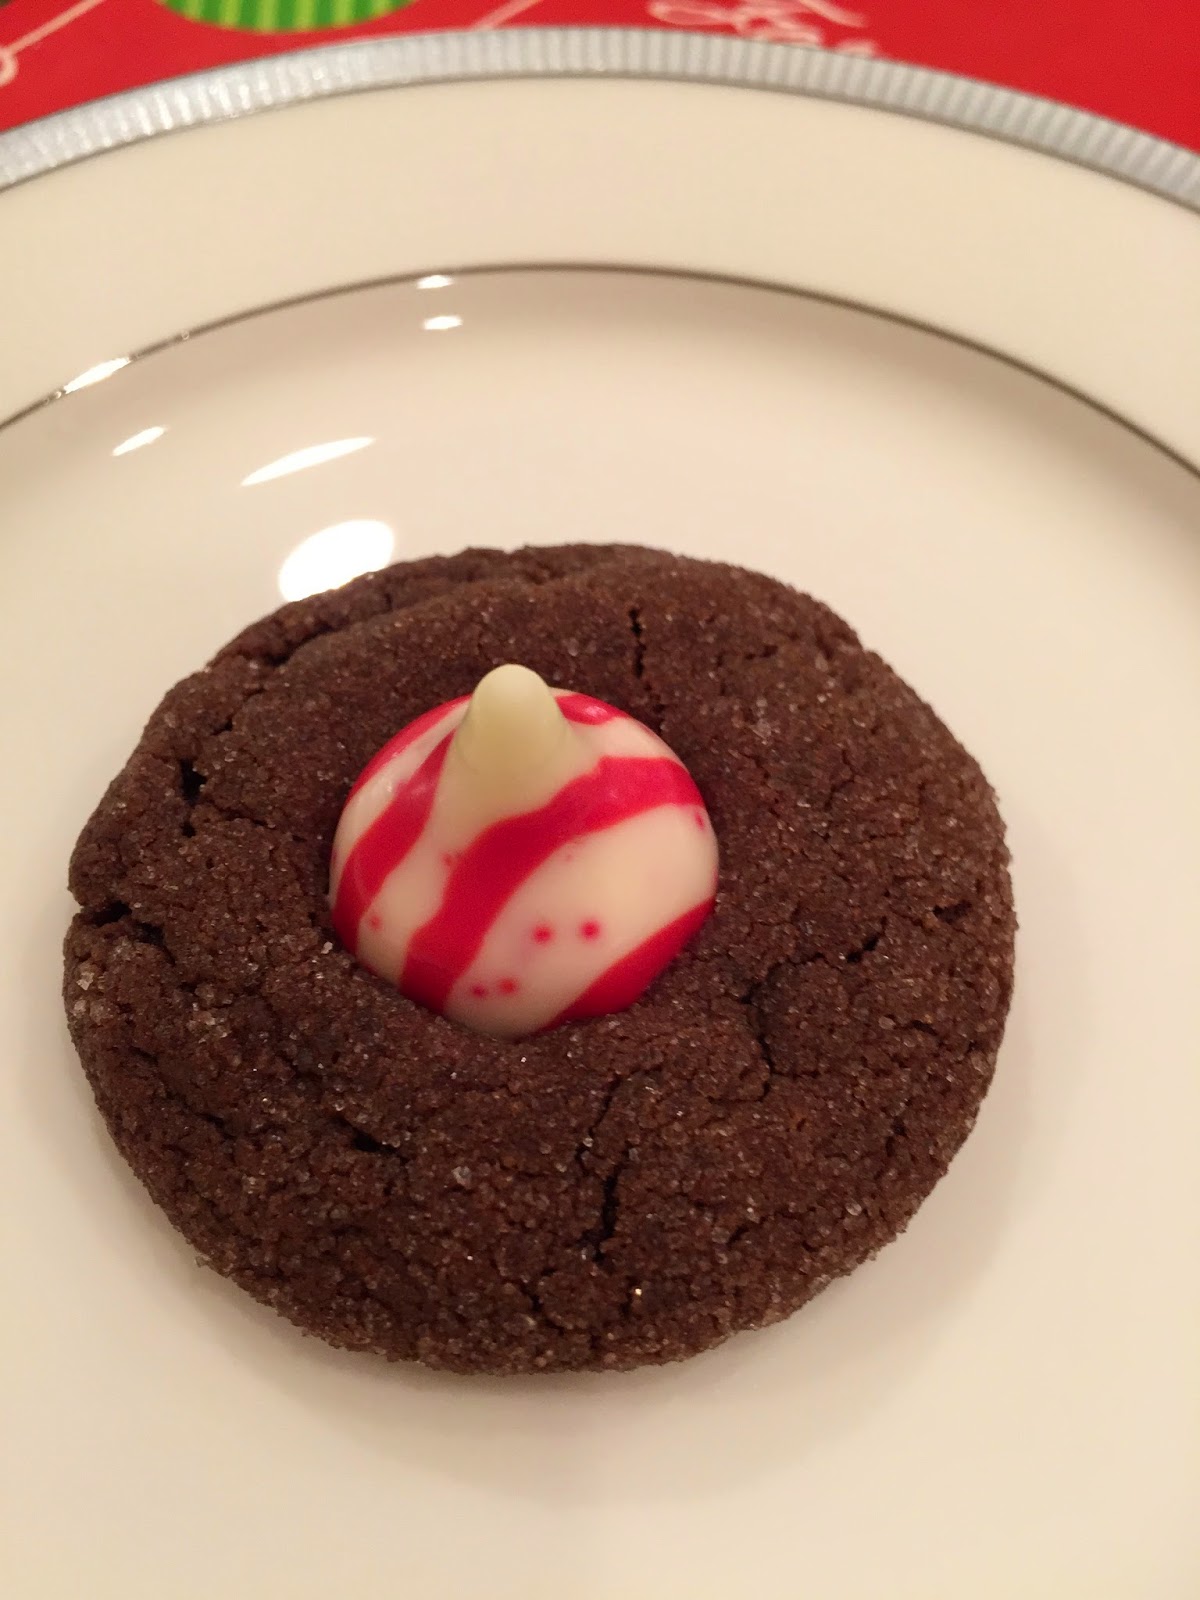
Chocolate Kiss Cookies - Peppermint, Hugs & Kisses

I first made this recipe about a year ago, for Valentine's Day - Hugs and Kisses Cookies.  Instead of a peanut butter cookie with a Hershey's Kiss on it, this is a delicious chocolate cookie.   The chocolate cookie is much more versatile than peanut butter.  The Hershey's Hugs and Kisses both tasted great.   A few weeks ago I made them with Peppermint Kisses - so yummy.  The chocolate cookies even taste wonderful by themselves.  Both times I have made them, I have frozen half of the dough and it works out quite well.   I think mini peanut butter cups would be good on these too!  Santa brought a lot of those, so I may try it when I bake the 2nd half of the batch.

Click here for the original recipe that I found on allrecipes.com.

I baked mine on cookie sheets lined with parchment paper, for 8 minutes.  I added the kisses and removed from the pan immediately.  Warning! - it's too tempting to not try one right away - just beware that the kiss is super soft and will go everywhere if you are not careful.  I think this is the best way to eat them - within a few minutes or an hour of baking them, while the kiss is still soft.  It's worth the mess!   And, to avoid destroying the beautiful cookies, store them in single layers.

This is a perfect way to start the transition from Christmas to Valentine's Day!


Peppermint Kiss Cookies

Hugs and Kisses Cookies

Friday, January 2, 2015

Giant Ginger Cookies

This is another cookie that I have wanted to make for years.  It is supposed to be a triple ginger cookie, but I missed the triple part and didn't have any fresh ginger.   Therefore, they became double ginger cookies with candied ginger and ground ginger.  The recipe has an icing for them, but I didn't have time to add icing to these.  They look really cool iced, stacked and packaged as gifts.

The original recipe is from Cuisine at Home's Holiday Cookies.

Cookies
Whisk together and set aside:
2 1/2 cups all-purpose flour
2 teaspoons ground ginger
1 teaspoon ground cinnamon
1/2 teaspoons ground cloves
1/2 teaspoon baking soda
1/2 teaspoon salt - I used a couple of grinds of sea salt
1/4 teaspoon ground white pepper (I did not use this)

Cream:
1 1/2 sticks unsalted butter, softened
1/2 cup sugar
1/2 cup brown sugar

Add:
1 egg
1/4 cup molasses
1/4 cup candied ginger, minced
1 Tablespoon fresh ginger, minced (this was the part I didn't have)

Scoop Dough; Coat In:
Turbinado sugar, coarse, or granulated sugar

Whisk flour, spices, soda, salt and pepper together in a bowl.
In another bowl, cream butter and both sugars together until smooth.
Add egg and beat until incorporated, then beat in the molasses, candied ginger, and fresh ginger.
Gradually add flour-spice mixture, mixing just to combine.  Chill dough until slightly firm, about an hour.

Preheat oven to 350; line two baking sheets with parchment paper.
Scoop dough into 2 1/2" balls - #20 cookie scoop or 1/4 cup.  Smooth onto balls, coat in sugar, and arrange on prepared baking sheets; spacing 3" apart.
Flatten the balls with the bottom of a measuring cup, then bake for 15-18 minutes, or until set.  (I baked mine for 15 minutes).  Let the cookies cool on the baking sheet for 5 minutes, then transfer to a rack.

If you want to ice the cookies, whisk together the icing ingredients until smooth.  Spread a tablespoon of icing on each cookie with a spatula.  Allow the icing to harden before packaging.

Tangy Lemon Icing:
2 cups powdered sugar
2 Tablespoons meringue powder or powdered egg whites
1 Tablespoon of milk
Minced zest of one lemon
Juice of 1/2 a lemon


Giant Double Ginger Cookies

Giant Double Ginger Cookies

Thursday, January 1, 2015

Yes, It's A Cake!

Happy 2015!

I made our favorite chocolate cake for New Year's Eve Dinner.

I sent the close-up picture to someone who shall remain unnamed (Mother).
Her response:  Is that a cake?  Interesting!
So, yes, it's a cake.  No, it didn't turn out as I pictured in my head, but it's not too far off either.  It has nothing to do with Frozen, and a lot to do with the snowflake sprinkles I forgot to use for Christmas.   The important part......it tastes amazing!  I made the Hershey's Chocolate Cake that is my stand-by recipe and my favorite buttercream frosting.  (see prior posts)  I used sky blue and white food coloring gel for the frosting, silver disco dust, and tons of snowflake sprinkles.

I am working on my goals for 2015, but I am not going to resolve to blog more because I did that last year and it had the opposite affect! :)  In the Spring I lost a whole year's worth of photos, which was super disappointing and took away a lot of my potential blog post pictures.  I have accumulated a good library again now, so I am hoping to have a better blogging year.

Here's to a happy and healthy New Year, with lots of creativity and productivity!

Chocolate Cake with Wintery Blue Buttercream Frosting & Snowflake Sprinkles

Chocolate Cake with Wintery Blue Buttercream Frosting & Snowflake Sprinkles

Monday, October 6, 2014

Tomato Pies and Tarts

One of my favorite things to make this past summer was tomato pie.   I have recipes torn out from magazines over the past couple of years, but when I bought a bunch of tomatoes in June, I could only find the picture of the specific one I wanted to make - apparently the recipe was later in the magazine and I neglected to keep that part.  So I went searching.  It's easy to find recipes these days, but I was looking for a specific recipe, based on the picture in my mind.   After reading A LOT of tomato tart and pie recipes, I started experimenting with the ones below.  I think I may have tried another, but it was not remarkable and was quickly forgotten.  

The tart is easy because it's just puffed pastry, tomatoes, herbs and Parmesan cheese.  One time I used fresh basil, another Italian Seasoning - most anything works.

My favorite is the Tomato Pie with Sour Cream Pastry.  It is best with regular sour cream (not light) and tomatoes in the peak of tomato season.  I made one last week; it was good, but not as amazing as the tomatoes that were summer rich and juicy.   I bought the larger tomatoes and used our grape, cherry, and Roma tomatoes that we grew.  The best one, of course, was the one I made with tomatoes straight from my Dad's garden in August when we were in Pennsylvania.  So very delicious!

Both crusts are pre-baked for 5-13 minutes.  The main different between the two is that the pie has a topping of mayonnaise, Parmesan cheese, and spices.   The pie takes about 35 minutes to bake once assembled, whereas the tart is only 10-15.  

The sour cream crust is pretty simple, I mixed it as much as I could with a dough whisk, and then kneaded it by hand the rest of the way.  It needs to be refrigerated for awhile, so I wrapped it in plastic wrap and refrigerated for 30 minutes to 4 hours depending on the day.   The crusts always looked so nice going into the oven, but then took on a life of their own.  So, don't be disappointed if they come out a lot different than when they went into the oven; the flavor is still wonderful!

To save myself a lot of time, I am just going to provide the links for the recipes that I based mine on.    So, if you are lucky enough to find some late tomatoes, give it a try, or file it away for next summer.

Sour Cream Pastry
Tomato Pie
Tomato Tart


Tomato Tart

Tomato Pie - Pennsylvania

Tomato Pie - Texas

Friday, October 3, 2014

Grandma's Cherry Cinnamon Cobbler

When Mr. SBQ and I were dating, he told me about this cobbler that his grandma made.  I am not a cobbler person, and was stuck on cherries and cinnamon candies in the same dish.  I am not sure if I let on that I didn't find it very appealing or if I just said "huh, interesting".   Fast forward several years and he found Grandma's recipe that she had sent him.  I looked at it and thought it might be ok, but I would surprise him and make it.  It didn't matter if I liked it or not, I would do it just for him.  Well, I was pleasantly surprised - it's very good!

The recipe calls for frozen or canned cherries, and the ingredients to make your own pie filling.  The store did not have canned or frozen sour cherries, so I just used a can of cherry pie filling.   I will confess that I forgot to put the brown sugar in the middle of the cinnamon rolls, with the butter and cinnamon, so I just sprinkled it on top.  Turned out just fine.

Cherry Cinnamon Cobbler
Filling:
one can of cherry pie filling (OR 1 can sour cherries, 1/2 c sugar, 1/2 c corn starch, 1/2 c water)
2-4 Tablespoons of cinnamon red candies (Brach's Cinnamon Imperials, red hots)

Heat the pie filling and cinnamon candies over low heat, to melt the candies.  I added a tiny bit of water (1 or 2 T?), stirring occasionally until candies are almost completely dissolved.   Place in the bottom of a square baking dish.

Cinnamon Rolls:
1 1/2 c flour
2 tsp baking powder
6 T brown sugar (divided, 3 for dough and 3 for filling)
1/4 c shortening (unsalted butter)
1 slightly beaten egg
2 T milk
1 T soft butter (melted)
1/2 tsp cinnamon

The recipe also calls for 1/3 cup of pecans and 1/2 tsp of salt, but I did not use those.  Also, I used rice milk.

Combine flour, baking powder, and 3 T of brown sugar.  Cut in shortening/butter.  Combine egg and milk and add to flour mixture.  Mix until moistened, adding a few drops of milk if necessary.  (I did not add any more milk and did the final kneading with my hands.)   Roll out on a lightly floured surface, to a 14x12 rectangle.  Brush with the melted butter.  Combine 3 T brown sugar with cinnamon and sprinkle over dough.  Roll up, cut into 3/4 inch slices, and place on the cherry filling.  Bake at 400 for 25-30 minutes.  Glaze while warm.


Lemon Glaze:
1/2 c powdered sugar
1 T lemon juice
Mix together and drizzle over the cobbler after it comes out of the oven.


Cherry Cinnamon Cobbler

Friday, January 24, 2014

Flourless Chocolate Cake with a Cloud of Cherries

This is one of those desserts that I got so excited about, and I am ready to make again.

I was trying to figure out what to make for Small Group a couple weeks ago.  I was talking on the phone to my mom and flipping through recipes when this idea formulated.   I saw a picture of cherry topped brownie bites and told my mom.  She asked if I remembered when she made the brownies topped with cream cheese and cherries.  That got me thinking!  I really wanted to do something Black Forrest like, I just didn't know what.  I was trying to figure out which brownie recipe might work well when I saw a Flourless Chocolate Cake recipe that I had saved from King Arthur Flour.   It all fell together from there and I was super excited.

The recipe was to be made in an 8" round pan lined with parchment paper.  My only 8" round pan that is deep enough is a spring-form pan.  I coated it really well with olive oil spray, but didn't use the parchment.  I will next time.  I didn't have any trouble with it sticking, but to ease the serving, I had loosened the bottom of the cake with a large offset spatula.  It would be a lot easier just to use the parchment lining and turn the cake out with ease.  I made the recipe pretty much as listed, except I only used 2 whole eggs and 1 egg white.  I did not make the ganache since I was making my own topping.

I baked the cake for 20 minutes and it was the recommended 200 degrees.  This was the first cake that I ever tested the interior temperature to see if it was done.

Once the cake was cool, I mixed a package of cream cheese with about a 1/2 cup of powdered sugar.  I spread that on the cake, and then topped with 3/4 of a can of cherry pie filling.

Recipe for the cake - King Arthur Flour
Cream Cheese Layer - 1 8oz package cream cheese softened, 1/2 cup powdered sugar
Cherry Pie Filling

So delicious!  This just has Valentine's Day written all over it!

Flourless Chocolate Cake with Cream Cheese and Cherries

Thursday, January 9, 2014

Gingerbread Men

I am choosing to write about the Christmas Day Gingerbread People today as a little trip down memory lane.  Today is my birthday, and many years ago (I cannot believe how many!) my mom and I made Gingerbread Men for my Kindergarten Birthday Party at school.  Back when you could take a treat to school to share with your classmates, and they were just gingerbread men (not people).  I am 99% sure we made our own stencil and cut out each cookie - no cookie cutter for us.  They had pink frosting decorations and in my mind they were the best gingerbread men ever!

These were kind of a rush job since we made them Christmas afternoon and I was about decorated and baked out.  We made several large cookies and a ton of small ones.  Next time they will just be the large cookies - they are much easier to decorate.  I finally made a small batch of royal icing for the decorations, but I did not take a lot of time for details.   I had not worked with royal icing before, so it was a little more stiff than I thought it would be.  I just quickly gave the tiny people dots for eyes, mouths, and buttons.

The cookies were good and had a very strong ginger flavor.  I would make this recipe again, using only the large cookie cutters and taking more time to decorate.  Be careful not to over bake, so they stay nice and soft.

These cookies are long gone, and I am looking forward to birthday cake tonight!  My favorite dessert I don't have to make! :)


Recipe from Cuisine at Home's Holiday Cookies.

Spicy Gingerbread People
Whisk together:
2 cups all-purpose flour
2 Tablespoons ground cinnamon
1 Tablespoon ground ginger
1 1/2 teaspoons ground cloves
1/2 teaspoon ground nutmeg
1/2 teaspoon ground white pepper
1/2 teaspoon baking soda
1/4 teaspoon salt

Cream:
1 stick of unsalted butter, softened
1/3 cup brown sugar
1/4 cup sugar

Blend in; Beat in:
1/4 molasses
1 egg
1/2 teaspoon vanilla extract

Cream butter and sugars until smooth.  Blend molasses in to butter mixture, then beat in egg and vanilla until fully incorporated.  Add half the dry ingredients, mix until nearly incorporated, mix in remaining dry ingredients.  Shape dough in to a disk, wrap in plastic and chill at least 2 hours before rolling out.

Roll out on floured work surface, to about 1/8" thick.  Cut out and place on parchment paper lined baking sheets.
Bake 10-12 minutes at 350.
Cool on pan for 5 minutes, then transfer to rack.  Decorate and store in airtight containers for up to one week.

Gingerbread Man

Monday, January 6, 2014

Molasses Spice Cookies

This was a new Christmas Cookie I tried this year.  The recipe is from the Cuisine Holiday Cookies book.  I have loved most every recipe I have tried in their two holiday baking books that I have.  I have made several and there are many more I want to try.  I was debating on making these Molasses Spice Cookies or Ginger Spice Cookies.  I did not have any candied ginger at the time, so I decided on these. I do have candied ginger now, so I will have to try the others too.  The only problem is that now I want to think about Valentine's Day - chocolate, pink, red........ahhh.  Anyway, back to a cookie that far exceeded my expectations.

Two common themes here - one, I think they are a perfect cookie and two, I did not have the time to chill the dough before I baked the first batch.  With all my planning, you wouldn't think this would be an issue, but it always is. (Gingerbread Men we baked on Christmas Day because they had to chill and I mixed them up Christmas Eve).

I ended up making these for Small Group and then freezing the rest of the dough and baking for our Christmas party.  The batch that had not chilled, and the batch that had been frozen and then baked both came out great.  Very moist and full of flavor!

Molasses Spice Cookies
In a medium bowl whisk together:
2 1/2 cups all purpose flour
1 Tablespoon ground ginger
2 teaspoons ground cinnamon
1 1/2 teaspoons baking soda
1/2 teaspoon each ground cloves, freshly ground black pepper, and salt
(yes, pepper!  I did not use that much salt; just a few grinds of sea salt)

In mixing bowl cream until light and fluffy:
1 cup packed dark brown sugar (I used light)
1/2 cup shortening (8Tbsp)
4 Tbsp unsalted butter softened (I do not like shortening, so I used all unsalted butter)

Add 1 egg; mix until combined.
Beat in 1/2 cup full flavor molasses and the minced zest of one orange. (I didn't have/use orange)
Add the flour mixture, beating just enough to combine.
Chill the dough at least 6 hours or overnight.  Or if you didn't plan like me, just bake them now. :)

Preheat oven to 350.
Line baking sheets with parchment paper.
Scoop dough using a small cookie scoop.  The recipe used a #100/1tsp scoop; I used a #70 because that is the smallest I have.
Roll in granulated sugar and place on the baking sheet, about 2 inches apart.  I think I had 5 rows of 3 on my sheets.
Bake cookies until edges are set, about 10 minutes.  Mine were perfect at 10 minutes.
Cool on the baking sheet.  I moved them to a cooling rack after about 5 minutes.

Enjoy the cookies and the "these are so good" comments you will get!
Molasses Spice Cookies

Friday, January 3, 2014

Peppermint Crunch Marshmallows

One of my favorite flavors....peppermint!
I made Peppermint Marshmallows for our Christmas party and then for Little C to take to school for her classmates for their Christmas "penny presents exchange."

This recipe is from King Arthur Flour.  I think I like these marshmallows better than the ones I made a couple years ago.  These are perfectly fluffy!  Of course, the others were plain and I coated them in sugar sprinkles rather than powdered sugar.  The powdered sugar lasts longer and doesn't affect the flavor of the marshmallows.  These are great by themselves or in hot chocolate!

Marshmallows are not a last minute whip-up as they need time to cure before cutting.  They are fun to make and it helps if you play Marshmallow World while putting them together, and then while cutting and tossing in the sugar! :-)

Click here for the recipe link.


Peppermint Crunch Marshmallows

Peppermint Crunch Marshmallows

Peppermint Crunch Marshmallows

Peppermint Crunch Marshmallows for Classmates

Wednesday, January 1, 2014

Vanilla Frosting


Happy New Year!

The cake I baked yesterday morning.....I had not used my Christmas Tree pan in about 3 years, so I wanted to make a cake with it this year.  We had too many desserts already for Christmas Day, so I decided just to make it for New Years as a white sparkly cake!  The only hint of glistening snow we will get around here.

I used to always use a box cake mix (funfetti holiday) for this pan (gasp!), but no more of that!  I wanted chocolate cake so I used the Hershey's recipe that I have almost memorized.   With the tree pan it took somewhere around 50 minutes to bake - I lost track of how many times I set the timer for 5 more minutes after the 30 minutes I started with.

I started using this frosting recipe a few years ago with other flavorings, but made it strictly vanilla with the chocolate cake and was amazed by the flavor.  Little C had gotten straight A's so I made her a celebration layer cake (below) and wanted white icing as the background for the A+ decoration.  I cannot describe how it tastes with the chocolate cake - just dreamy!

After all my talk about the hand mixer and the chocolate frosting yesterday, I still used the stand mixer for this frosting.  I think I can get it a little smoother with the hand mixer (less air pockets).  I recently discovered that there is white food coloring!  I used about 30 drops to lighten up this butter icing, but I stopped there because I think it would have taken the whole little bottle to get it perfectly white.  The white food coloring looks like white-out, but it is neat to see it work.

I frosted the chocolate tree with the white vanilla frosting and decorated it with white pearls, silver foil stars and silver disco dust.  Delicious and pretty!


Vanilla Frosting
1 cup of unsalted butter (2 sticks, softened)
4 1/2 - 5 cups powdered sugar
2 teaspoons vanilla
3-4 tablespoons of milk

Cream butter in mixer, add half of the powdered sugar and mix until incorporated.  Add half the milk and mix; repeat with the remaining sugar and milk.  Add vanilla and coloring.  This frosting is great for piping or spreading.


Tuesday, December 31, 2013

Chocolate Frosting

Happy New Year's Eve!
I am trying something new today - posting from my iPad.  So, if anything looks weird, it's not intentional!  We'll see how this goes.

I have written before on the favorite chocolate cake around here.  It's on every Hershey's Cocoa container - Perfectly Chocolate Cake.   The Perfectly Chocolate Frosting that goes with it is the best chocolate frosting ever!  I had been having a little trouble with the frosting being smooth, due to the way the ingredients are added, but I have played with it and gotten a frosting that I get rather excited about!   Since the butter and cocoa mixture are warm from melting the butter, when I would add the milk, the chocolate would cool and there would be thicker bits of cocoa throughout the frosting.  What I have started doing is making the frosting in the pan that I melt the butter in.   This way there is not any drastic change in temperature and rapid cooling.  (Note: turn the burner off)  I add part of the powdered sugar first, mix it really well with the hand mixer, then add a small amount of the milk.  At this point it looks like it is never going to be smooth, but it gets the sugar and cocoa mixture evenly incorporated so that there are not any clumps of chocolate.  Then repeat with the rest of the powdered sugar and milk.  I just keep mixing and using a spatula to move the icing from the sides of the pan.  I do this for much longer than seems necessary, and add a little more milk if it seems a little too thick.  It becomes this beautiful smooth velvety frosting.  A key thing is to not get caught up in the excitement of the pretty frosting and forget to add the vanilla at the end.  This has happened to me and I was the only one that noticed, but it tastes much better with vanilla.  And, it will keep you from wondering why the cake tasted different this time, and waking up in the middle of the night saying - of course it was different, I forgot the vanilla in the frosting!   A few times I was afraid to add more milk and then regretted it because the frosting was a little harder to spread.  Plus, sprinkles stick a lot better to a moister frosting.

I purchased a Wilton Cake Caddy with the turntable base - this makes all the difference in frosting a round cake!  I can focus on the frosting, not the rotating of the cake.   This also stores the cake very well, which always seems to be a problem with layer cakes - airtight, no smashing the icing....

I had bought the disposable 9x13 cake pans so I could easily take a cake to an dinner and not worry about how I was going to transport it and deal with a pan/platter.  I love making the cakes in these pans!  Since it's not a layer cake and due to the shape of the pans, the cake is a little more dense and so moist!  The clear plastic lids are great too!  

These are not new inventions, but things I just started using and am quite happy with!

Below are a bunch of cakes I have made over the past year.  I guess I didn't take a picture of the first one I made in the disposable pan; it was so beautiful and just pretty icing, not overloaded with sprinkles.  Not that you can have too many sprinkles, but the icing was beautiful.

Now I need to go make one of these cakes to frost with white icing for our New Year's Eve dinner. :-)